Are you considering how to transfer your domain to a new registrar but don’t know where to start? Domain transfer might seem complicated, but with the right steps and preparation, the process can be smooth and straightforward. Whether you’re looking for better customer support, more affordable pricing, or a host of advanced features, transferring your domain is a decision that can benefit your online presence.
We offer domain registration and transfer services to thousands of customers across the globe.
Our Instant Domain Search and user-friendly platform are designed to simplify domain management, giving you full control of your portfolio without needing to rely on multiple providers.
Ask any of our current domain owners, and they’ll tell you how much easier it is to manage their domains with us compared to other providers.
We don’t spend time spamming you with up-sells and promotional emails, we focus on providing reliable domain management.
In this comprehensive guide, we’ll walk you through how to transfer your domain successfully and ensure that you don’t lose any important information or suffer downtime. Let’s dive in.
Why Transfer Your Domain?
Before we begin, it’s essential to understand why someone might want to transfer a domain. Here are some common reasons:
- One Centralized Location: Manage both your domains and hosting services from a single dashboard, making it more convenient to oversee all your online assets in one place.
- Better Pricing: Registrars often offer promotions and lower renewal fees, making it more affordable to switch.
- Improved Customer Support: Some registrars provide faster and more responsive customer service, which is essential for businesses.
- Additional Features: Some providers like us offer advanced tools, such as easier DNS management, free WHOIS privacy, and automatic SSL certificates.
- Consolidating Domain Management: If you own multiple domains, consolidating them under one registrar can simplify management and billing.
No matter your reason, transferring your domain to a reliable and affordable provider like Aveshost can be a smart move. Here’s how to do it.
Preparing for Your Domain Transfer
Before starting the domain transfer process, there are a few steps to prepare and ensure a smooth transition. Failing to follow these pre-transfer steps can result in delays or even a failed transfer.
1. Check Your Domain’s Eligibility for Transfer
- 60-Day Lock Rule: ICANN (Internet Corporation for Assigned Names and Numbers) regulations prohibit domain transfers if your domain has been registered or transferred within the last 60 days. Check the registration date to ensure you’re eligible.
- No Active Lock: Ensure that your domain is not currently under a registrar lock (also called a transfer lock). This is often enabled by default to prevent unauthorized transfers.
2. Update Your WHOIS Information
Your domain’s WHOIS information needs to be accurate and up-to-date. This includes your name, email, phone number, and address. Registrars will use this information to verify your identity during the transfer process.
3. Disable WHOIS Privacy Protection
Some registrars provide WHOIS privacy services to hide your personal information from the public database. However, during a domain transfer, you’ll need to disable this service so that your new registrar can verify the domain ownership.
4. Unlock Your Domain
Log in to your current registrar’s control panel and unlock your domain. This is a crucial step, as locked domains cannot be transferred. This option is typically labeled as “Domain Lock” or “Registrar Lock.”
5. Obtain the EPP/Auth Code
The EPP or Auth Code (sometimes called transfer key or authorization code) is a unique code used to authenticate domain transfers. You’ll need to request this code from your current registrar, and it will be sent to your registered email address. Keep this code safe, as you will need it during the transfer.
Guides for Transferring Your Domain with Popular Providers
Here are links on how to accomplish this with some well know providers:
How To Transfer Your Domain to Aveshost
Once you’ve completed the preparation steps, you’re ready to transfer your domain to Aveshost. Here’s a step-by-step breakdown of the process:
1. Go to our Domain Transfer page, type in your domain, and click transfer

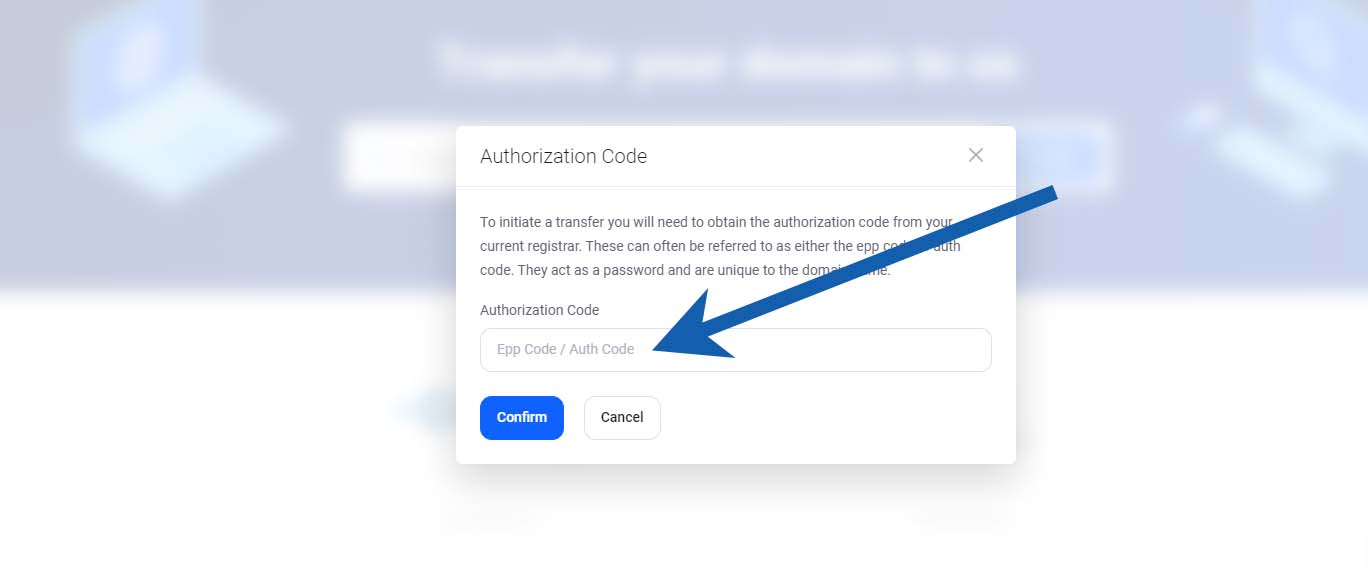
2. Enter your valid EPP/Auth code
A popup screen will ask for the EPP/Auth code you requested from your current provider. Please enter this here and make sure it’s correct .

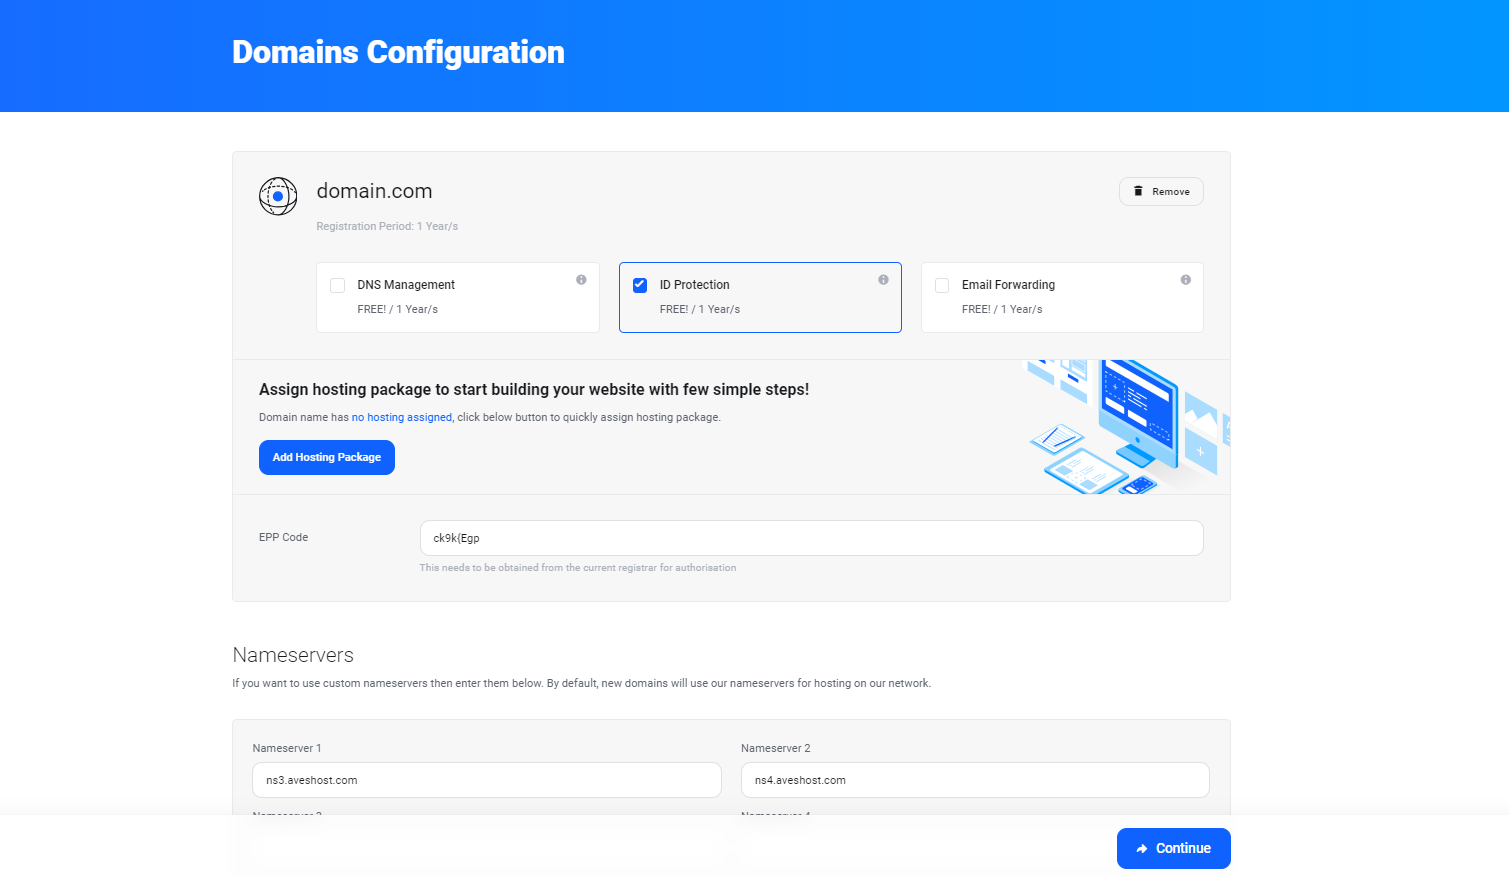
3. Configure your domain
If you don’t already have web hosting with us, or you’d like to add another account, you may add it here.
- DNS Management: Manage your DNS records for your domains, even if you don’t have hosting services with us.
- ID Protection: Safeguard your personal information from being displayed in the public WHOIS database. This service includes email forwarding with spam filtering. Highly recommended for privacy.
- Email Forwarding: Forward emails sent to @yourdomain.com to an existing email account (such as @gmail.com). This feature is unnecessary for customers who purchase hosting along with their domain.
- Nameservers: Input the nameservers you want to use for your domain. If you already have hosting, these details can be found in our Client Portal or your welcome email.

Once finished configuring, click Continue.
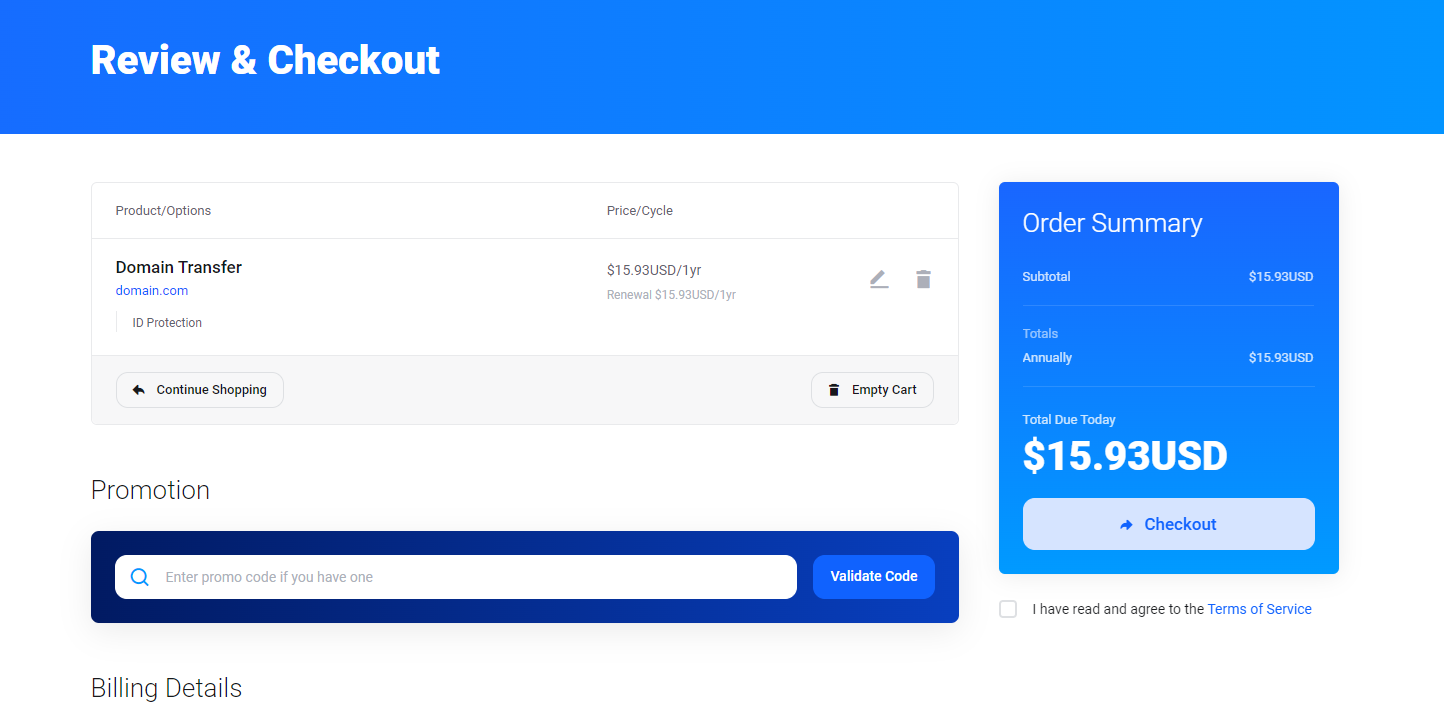
4. Review & Checkout
If you’re an existing customer, make sure to click the Already Registered button to login. If not, proceed with filling out your information. It’s important you enter valid information as our order system will not process your payment if it cannot be verified.
Finally, choose your payment method. Remember, domains must be renewed each year, and failure to pay will result in the domain becoming available again to the general public.
To complete your order, please review our Terms of Service and click on checkout

5. Wait for the domain transfer to complete
Once your payment is processed, your domain will appear as “Pending” in the Aveshost Client Portal.
Once your current registrar approves the transfer, the status will automatically update to “Active,” and no further action will be needed on your part.
Most domain registrars approve transfers within 2-5 business days, provided all steps were completed correctly (e.g., the correct EPP code and domain unlocked). If any issues arise, our billing team will notify you via email. Some registrars, like GoDaddy, may even approve transfers instantly if you contact their support after initiating the transfer. Alternatively, you can approve the transfer request yourself by following the steps outlined here.
After the transfer is complete, you’ll receive an email to verify your email address. Be sure to click the link to keep your domain active.
6. Make sure to verify your email address
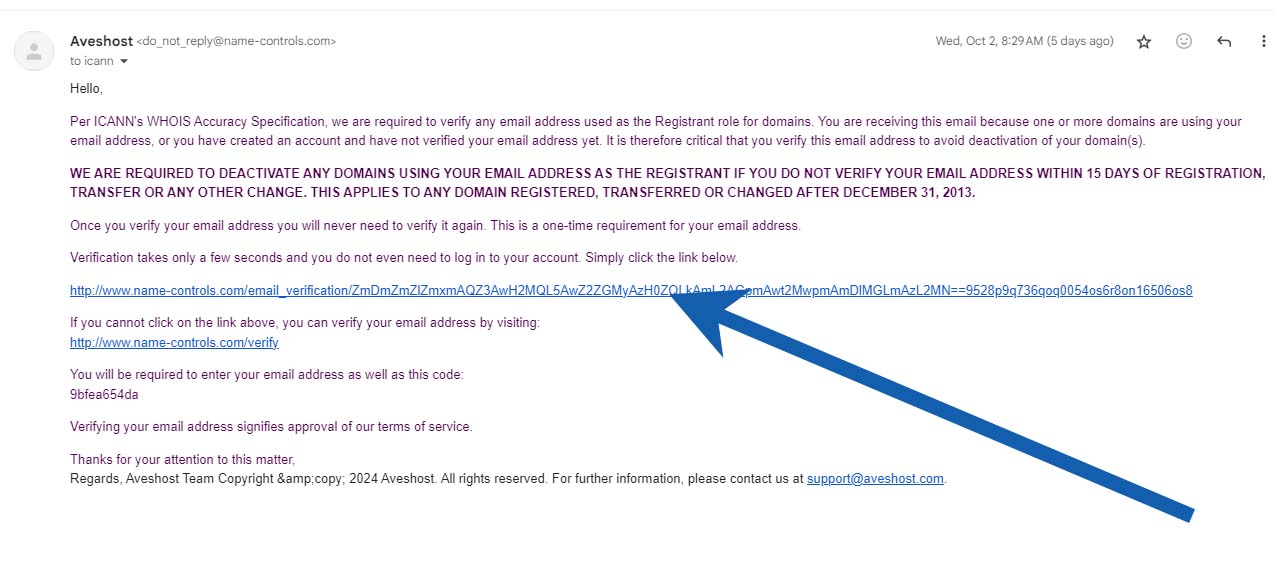
For all new domain registrations and transfers, we are required to verify that your email address is valid. Within a few hours of your transfer being completed, you will receive an email from the registry with a link that must be clicked within 15 days. The email will look like this:

If you do not click the link, the registry will place your domain on hold, which will disable it and cause your website to go offline. If you haven’t received the email within 24 hours of registration, please check your Spam or Bulk email folder, or contact our team to have the email resent.
What Happens During the Domain Transfer?
When transferring a domain, it’s essential to understand what happens behind the scenes. Here’s what typically occurs:
- DNS Settings Remain Unchanged: Your domain’s DNS settings will not be affected during the transfer, ensuring that your website and email services continue to operate without interruption.
- Renewal Date Stays Intact: The remaining time on your domain registration is not lost when you transfer. In fact, most domain transfers add an additional year to your current registration.
- No Downtime: There is no downtime when transferring a domain.
Common Questions About Domain Transfers
A domain transfer typically takes 2-5 days. Factors like registrar response times, approval processes, and any issues with your domain can affect the exact duration.
No, your website should not experience downtime. The DNS settings associated with your domain will remain unchanged throughout the transfer, ensuring continuous service.
In most cases, expired domains can still be transferred during the grace period, but it depends on the policies of your current registrar. It’s best to initiate the transfer before the domain expires to avoid complications.
Yes, there may be a transfer fee, but this often includes an additional year of registration for your domain. At Aveshost, we strive to offer competitive pricing for domain transfers.
Conclusion: Why Transfer Your Domain to Aveshost?
Transferring your domain can provide you with better management tools, improved security features, and more cost-effective renewal rates. At Aveshost, we make the domain transfer process simple and straightforward, so you can focus on what matters—growing your online presence. Our expert support team is available to help you every step of the way.
If you’re ready to transfer your domain, sign up for Aveshost today and enjoy seamless domain management, affordable pricing, and top-tier customer support.


