Transfer Your Domain from Namecheap to Aveshost
When considering a domain transfer, the choice of hosting provider is paramount. In the vast landscape of hosting providers, Aveshost stands out for its robust features, affordability and reliable performance.
Also Read: How to Transfer Domain Name From GoDaddy
In the dynamic world of online presence, your domain is the digital handshake your visitors remember. With rising costs and additional fees associated with Namecheap, it’s time to consider a change.
- Transfer Your Domain from Namecheap to Aveshost
- Why Transfer to Aveshost?
- Step 1: Prepare Your Domain for Transfer
- Step 2: Transferring to Aveshost
- Step 3: Initiate the Transfer to Aveshost
- Step 4: Domains Configuration
- Step 5: Confirm Transfer Details
- Step 6: Sign In/Sign Up with Aveshost
- Step 7: Pay for the Domain Transfer
- Step 8: Approve Confirmation Emails
- Step 9: Wait for the Transfer to Complete
- Step 10: Verify Domain Settings on Aveshost
- Conclusion
- Recap of Key Steps
In this comprehensive guide, we’ll walk you through the process step by step, ensuring a smooth transition without any disruptions to your website.
Why Transfer to Aveshost?
Before we delve into the transfer process, let’s quickly highlight why Aveshost is the right choice for your domain:
- No Hidden Charges or Unpleasant Surprises: Picture this: no hidden charges, no ICANN charges, no unpleasant surprises. Aveshost takes pride in its transparent approach, ensuring you’re well aware of what you’re paying for. Unlike some competitors, there are no unexpected fees lurking in the shadows.
- No Extra Charges for Domain Renewal: Aveshost believes in fair pricing. Bid farewell to the frustration of unexpected charges for domain renewal. With Aveshost, what you see is what you get—no gimmicks, just a straightforward approach to hosting your domain.
- Affordability Without Compromise: While Namecheap may have earned its name, Aveshost has redefined the game. Why settle for an expensive option when you can enjoy top-notch services without burning a hole in your pocket? Aveshost thrives on affordability without compromising on performance.
- Excellent Customer Support: Known for its excellent customer support, Aveshost ensures you have assistance when you need it.
- Cost-Effective Hosting Solutions: Aveshost stands tall as a beacon of affordability. In an era where every penny counts, Aveshost offers hosting solutions that don’t compromise on quality. Say goodbye to the days of being nickel-and-dimed for essential services.
Making the Switch
As we dive into the steps of transferring your domain from Namecheap to Aveshost, envision a hosting solution that not only saves you money but elevates your online experience. Aveshost isn’t just a choice; it’s a strategic move towards efficient hosting and financial sensibility.
Aveshost—a hosting partner that doesn’t just meet your expectations but exceeds them.
Now, let’s get started with the domain transfer process.
Step 1: Prepare Your Domain for Transfer
Before initiating the transfer process, ensure you have completed the following:
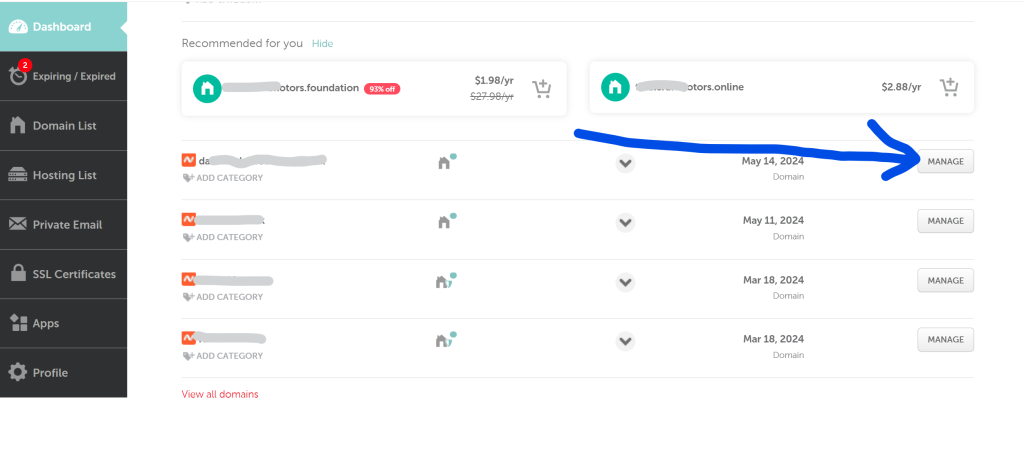
- Namecheap Account Login: Log in to your Namecheap account, look for the domain you want to transfer to Aveshost and click on “MANAGE“.
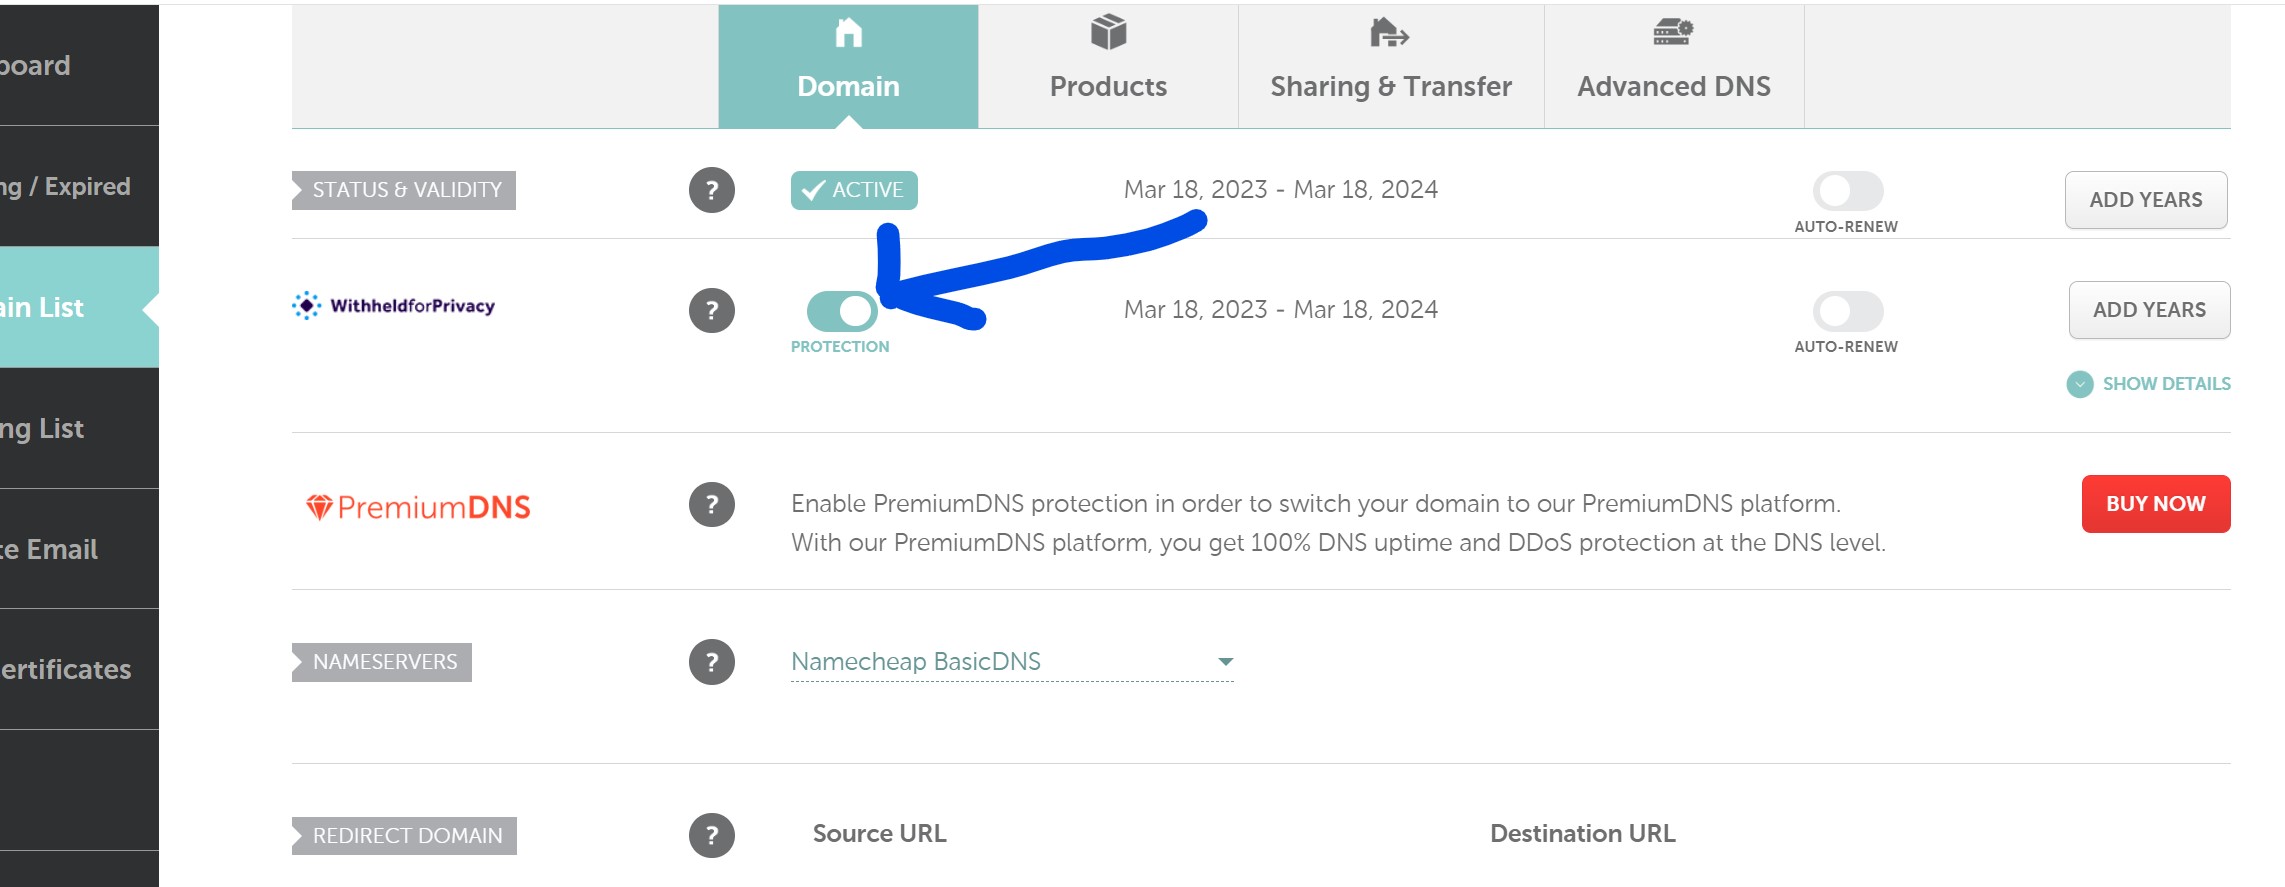
- Disable Withheld For Privacy: On the manage tab turn off withheld for privacy. It’s essential for this to be turned off for the transfer to go through.
- Unlock Your Domain: Now switch to the “Sharing & Transfer” and scroll down and click on UNLOCK to unlock your domain.
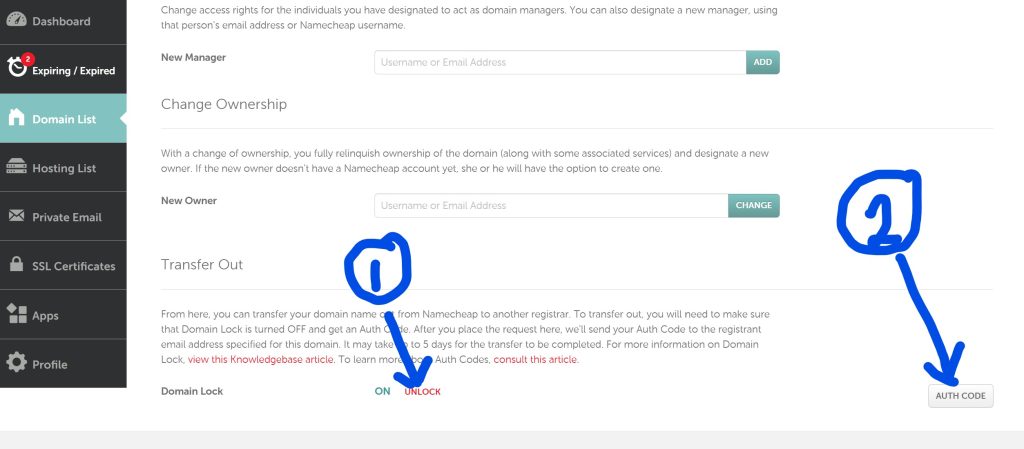
- Retrieve Authorization Code: Also click on “AUTH CODE” to get the authorization code or the EPP code. Remember a click on the auth code shows a popup you can choose your reason for transferring the domain and then you click on “Send Code” button the auth code will be sent to your email. Check your email for the Auth Code you will need for the next step.
Step 2: Transferring to Aveshost
After unlocking and getting your auth code it’s time we start the transfer process to Aveshost. Go to Aveshost.com and scroll to the bottom of the page thus to the footer and click on Domain Transfer

Step 3: Initiate the Transfer to Aveshost
Enter the name of your domain you want to transfer in the search box and click on transfer. A modal or popup would appear enter the Auth Code you obtained from Namecheap in your email in the field.
Step 4: Domains Configuration
On the next page you will be presented with some optional domain add-ons, select the ones you may be interested in. I highly recommend you choose ID Protection, this is a security feature that protect your information associated with your domain name.
Step 5: Confirm Transfer Details
Review the transfer details carefully. Ensure that the domain information is accurate.
Step 6: Sign In/Sign Up with Aveshost
If you are existing customer with Aveshost, login with your details and if you are new fill in your details with your information to create an account. Accept the terms of service and click on the checkout button to checkout.
Step 7: Pay for the Domain Transfer
Complete the payment process for the domain transfer. Aveshost may charge a fee for the transfer, which may include an extension of your domain registration. You are paying for the transfer because when you transfer a domain to a new registrar which in this case Aveshost, the registration period for the domain is extended by one year.
Step 8: Approve Confirmation Emails
After initiating the transfer, both Namecheap and Aveshost will send confirmation emails. Approve the transfer in these emails to proceed.
Step 9: Wait for the Transfer to Complete
Domain transfers typically take 5-7 days. During this period, your website will still remain operational without any downtime. Note if you want transfer process to be instant without the 5-7 days period you can get in touch with Namecheap and ask them to instantly approve the transfer request.
Step 10: Verify Domain Settings on Aveshost
Once the transfer is complete, log in to your Aveshost account and verify that your domain settings are accurate. This includes checking nameservers, DNS records, and any additional configurations.
Conclusion
Congratulations! You’ve successfully transferred your domain from Namecheap to Aveshost. If you encounter any issues during the process, don’t hesitate to reach out to the customer support teams at Aveshost for assistance. We would be more than happy to assist you with your domain transfer
Recap of Key Steps
- Prepare Your Domain for Transfer: Unlock Your Domain and obtain your authorization code
- Transferring to Aveshost: Starting the transfer process to Aveshost.
- Initiate the Transfer on Aveshost: Locate the domain transfer option. Enter the domain you want to transfer
- Domains Configuration: Domain Add-ons selection
- Confirm Transfer Details: Review the transfer details
- Sign In/Sign Up with Aveshost: Login or create an account with Aveshost.
- Pay for the Domain Transfer: Complete the payment process for the domain transfer.
- Approve Confirmation Emails: Both Namecheap and Aveshost will send confirmation emails.
- Wait for the Transfer to Complete: Domain transfers typically take 5-7 days.
- Verify Domain Settings on Aveshost: Once the transfer is complete, log in to your Aveshost account and verify



This Post Has 2 Comments
Thanks, Kennedy, for the great post! I was able to transfer my domain, and the domain request was instantly approved by Namecheap when I got in touch with them.
Thank you for sharing your experience! It’s wonderful to hear that you had a smooth domain transfer. Glad the post was helpful!”